GUIDE: The Basics of Backcountry Meal Planning
If you’re going to be spending multiple nights in the backcountry, it’s important to plan out your meals and water situation, as these items are crucial to having a great experience. No one likes a cranky hungry camper, especially after having trekked multiple miles with 30+ pounds on your back. While food is essential, water is even more important. Your body can go a few weeks on very low food rations (you’d be surprised how far you can stretch a small amount of food). What it cannot do is survive more than a few days without water, especially if you’re exerting yourself as you do when backpacking.
1. Plan for Water before anything else.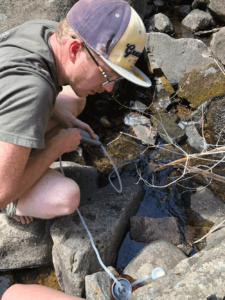
Plan for water first. Look up your intended trail or destination. Are there creeks? Rivers? Lakes? If you have a water purifier (Worth every penny!), you can get water from these sources. Make sure to avoid stagnant water or any water source that appears polluted. Your best bet is to stick your purifier in the middle of running water, even if it’s a small stream.
Bringing a water purifier will allow you to carry only as much water as you’ll need to get to your destination. Once there, you can continue to refill with purified water throughout your stay. If you’re like me, especially if you’re smoking like me, you’re going to very thirsty after consuming and backpacking all day. If there’s no water nearby, or you don’t have a purifier, plan to carry 2 liters of water for every day you’ll be on the trail. Half days (if you left midday Friday, for instance) count as a full day because you’ll be exerting yourself differently than if you were lounging at home staying hydrated.
2. Shelf Life
Once you’ve got the water situation figured out, you need to focus on food. The best option for backpacking are those with a long shelf life. You probably won’t have any sort of refrigeration when you’re in the woods (you can occasionally use cold ponds to “chill” drinks”). This means foods that you’d find in your pantry or any aisle but the cold ones.
3. Lightweight
Additionally, you’ll want foods that aren’t going to weigh your pack down. A can of tuna will outlast a few decades, but it’ll also add a lot of weight to your pack, and, when you’re done eating it, you’ll have to pack that can back down the mountain. Instead, focus on lightweight options like packets and pushes. Tuna and beef jerky come in disposable pouches and don’t need to be refrigerated. You can also fish or hunt for animals in your area, but be aware of the necessary permits and seasons for doing so to avoid any issues with park rangers.
4. Foods That Pack a Punch
Lastly, try to find foods that are loaded with calories. More calories means more energy for your trek. It also means you won’t have to carry as much food if the food you do pack, packs a punch.
P.S. Something else to keep in mind is how easy your meals are to prepare. You have a limited amount of dishes and fuel, and you don’t want to use them all on the first meal of the trip. Dehydrated options and “just add water” meals are great for avoiding cleanup and rationing fuel for stoves.
More Resources:
SIMPLE LIGHTWEIGHT BACKPACKING FOOD IDEAS – TOP PICKS FROM THEJOHN MUIR TRAIL
https://bearfoottheory.com/backpacking-food-ideas/
31 BACKPACKING FOOD IDEAS FROM THE APPALACHIAN TRAIL
https://www.greenbelly.co/pages/backpacking-food-ideas
35+ EASY BACKPACKING FOOD IDEAS
https://www.freshoffthegrid.com/backpacking-food-ideas/
HOW TO CUT WATER WEIGHT: A BACKPACKER’S GUIDE TO HYDRATION
https://www.greenbelly.co/pages/how-much-water-should-i-carry-backpacking